Table of Contents[Hide][Show]
You must have heard of facial oils—a liquid moisturizer with many incredible benefits that’s often made up of highly nutritious oils and stored in small vials. Did you know that you can easily make this in the comfort of your own home? You read that right. Plus, the benefit of DIY-ing your own homemade facial oil is that you have full advantage of customizing your ingredients and recipe to best serve your specific needs.
Facial oils are oil-based liquids designed to moisturize the skin for a soft, supple look. Facial oils are a mixture of essential oils and non-comedogenic botanical oils. By selecting the right oils for your skin type, DIY facial oils aren’t likely to cause clogged pores since they include plant extracts and antioxidants that help balance your skin.
Facial oils are tailored to match your skin’s natural oils to keep things balanced—and transform your skin from dull to dazzling. Keep reading to learn how to make facial oils with essential oils that are best suited for your skin!
Are Serums and Natural Face Oils the Same Thing?
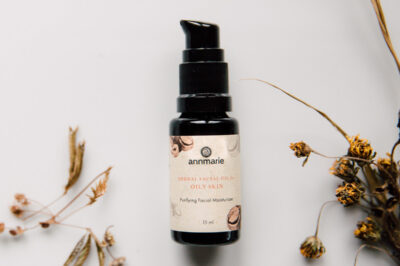
Herbal Facial Oil for Oily Skin
Specially formulated with cleansing botanicals, white willow bark and neem, this delicate herbal blend helps unclog pores and balances natural oils. Lightly moisturizing with a fast-absorbing grapeseed oil base. Leaves skin soft and smooth for a bright and beautiful complexion.
You may have come across a “serum” from some of your favorite beauty brands only to find that the formula’s oil-based, like a facial oil. Most likely, that “serum” you came across is actually a facial oil.
- Serums are aqueous-based solutions that serve as hydrators in a skin care routine, which play a very different role from oil-based moisturizing products. Read more about what a face serum is and what its benefits are.
- Natural facial oils, on the other hand, don’t usually house aqueous-based ingredients and instead must include a carrier oil as a base. The base can be optionally mixed with essential oils for additional benefits.
When making your homemade DIY facial oil, you must consider your skin and what its needs are. Is it oily or dry? What are good carrier oils for your skin type? (Fun fact: different oils have different molecular weights and it’s important to find one that works in concert with your skin). If you experience sensitivities and temporary redness, you will have to select your carrier oil and essential oils that combat your specific issues.
How To Make Your Own Natural Face Oil Recipe
1. What is my skin type?
To make a facial oil, you might be wondering what your skin type is, especially since coming up with a tailored recipe requires that vital piece of information. Many people who deal with skin issues often associated with oily skin tend to assume they automatically have oily skin, which isn’t always the case.
To determine your skin type with confidence, try this little test: after cleansing your face, let it dry naturally. If your skin feels tight, then you might have normal or dry skin. But if your skin feels light and refreshed after washing, that means you most likely have oily or combination skin.
2. Select a carrier oil best suited for your skin type.
To make your own DIY facial oil, you’ll want to start with your carrier oil. Carrier oils serve as wonderful bases for facial oils since they tend to work with our skin rather than against it.
While this myth has been demystified in the past few years, there’s still some concern around applying facial oils directly to the face—mostly due to the fear of it causing the skin issues that come with clogged pores. They are great for skin, though, because they have the same makeup as our natural skin, and these wonderful oils keep the dryness at bay without clogging your pores.
- Dry or mature skin: Apricot kernel oil, jojoba oil, hemp oil, sunflower seed oil, sweet almond oil, argan oil or avocado oil.
- Normal and combination skin: Sunflower seed oil, jojoba oil or grapeseed oil.
- Oily skin: Grapeseed oil, hemp seed oil, chia seed oil, argan oil or rosehip seed oil.
Benefits of these carrier oils on the skin
- Apricot kernel oil: Deeply nourishes the skin, decreasing the appearance of fine lines and wrinkles. It also contains antioxidants, which help keep the skin looking healthy.
- Grapeseed oil: A wonderful lightweight oil that easily absorbs into the skin and works great for those dealing with visible levels of oil production. This is the base we use for our popular Herbal Facial Oils for Normal & Combination Skin, Oily Skin and Sensitive Skin.
- Jojoba oil: Closely resembles your skin’s natural oils and is deeply moisturizing. It also helps the skin better absorb other ingredients and helps protect the youthful glow of your skin.
- Hemp oil: Has deeply moisturizing and soothing properties.
- Sunflower seed oil: An excellent antioxidant that keeps the skin protected from environmental stressors.
- Sweet almond oil: Temporarily reduces the appearance of puffiness, shields skin against harsh elements and improves skin tone.
- Argan oil: Is rich in antioxidants, moisturizes and reduces temporary redness.
- Avocado oil: Moisturizes, has a calming sensation and purifies the skin.
- Rosehip seed oil: Soothes sensitivities and temporary redness, firms and tightens.
3. Accessorize with essential oils to specifically target what your skin needs.
Essential oils are great for all skin types. When making your DIY face oil, include essential oils in your recipe to help you narrow in on your skin goals—for example, boosting hydration, soothing skin and reducing the appearance of temporary redness.
When making a facial oil, you should note that essential oils need to be combined with carrier oils as they are too potent on their own and can cause more harm than good. You need to combine around 1-2% of your essential oil with a carrier oil for a daily face oil.
Recommended essential oils based on skin type
- Dry skin: Essential oils of lavender, rose, frankincense, myrrh, clary sage or geranium
- Normal or combination skin: Essential oils of lavender, frankincense or geranium
- Dry or aging skin: Essential oils of frankincense, lavender, myrrh, rose, geranium, helichrysum, cypress or clary sage
The benefits of these essential oils for the skin
- Lavender: Calms skin, soothes dryness and balances natural oils.
- Frankincense: Soothes skin and tackles skin issues derived from clogged pores.
- Myrrh: Reduces the appearance of fine lines and wrinkles and soothes the skin.
- Clary sage: Alleviates temporary redness or skin discomfort.
- Geranium: Reduces skin sensitivities and skin issues derived from clogged pores.
- Rose: Helps renew the appearance of skin and reduces the appearance of dark spots.
- Helichrysum: Has a calming sensation, promotes an even skin tone and reduces the appearance of fine lines and wrinkles.
- Cypress: Firms and tightens and provides a fresh and revitalized appearance.
4. Add the finishing touches with a dose of vitamins
Vitamin E is high in antioxidants, and it plumps up the skin while protecting it against environmental stressors. It is also an excellent moisturizer. Use this vitamin if you are looking to enhance a rejuvenated look.
Vitamin C is high in antioxidants and wonderful for soothing the skin. This vitamin also protects the skin against environmental stressors. Use this vitamin if you are looking to support a brighter glow.
How To Properly Dilute Essential Oils in Carrier Oils for Facial Oil
To make a facial oil with the above combinations, remember that skincare recipes typically use 1% essential oil dilution. So, when creating your facial oil, you will have 6-9 drops of essential oil to 2 tablespoons of carrier oil.
- One tablespoon of a carrier oil
- One tablespoon of another specialty (seed) oil or a blend of specialty oils.
- 6-9 drops of essential oils.
How To Use DIY Facial Oils Correctly
Understand the order of application
There are so many skin solutions from serums and elixirs to facial oils. It can be confusing trying to figure out not only how to apply each product but also the most effective order for applying them.
When considering the best way to apply a facial oil (whether bought or made at home), we recommend this general skin care rule: you’ll want to start applying from the lightest to the heaviest/thickest in terms of product texture. It is best to start off with light products like serums (aqueous or aloe-based) and then move up to thicker products like moisturizers (such as facial oils) and sunscreen.
Because water and oil don’t like to mix, putting on your serum first and then your moisturizer will take advantage of the hydrophobic effect, which creates further separation between your serum and your oil. This pushes your nutrient-rich serum deeper into the skin, and the facial oil acts as a seal to lock in all of the serum’s beneficial nutrients while also creating a protective barrier from the elements. The oil gently sits on (and over time soaks into) your skin keeping it continuously moisturized, resulting in that radiant glow.
How to apply DIY facial oil on the skin
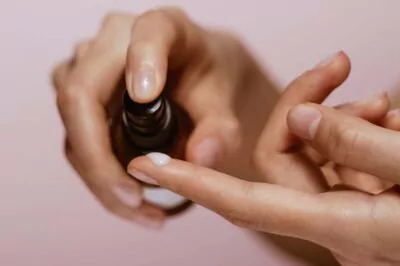
With your homemade face oil, use it in the morning and the evening or as needed. Apply to clean skin. Depending on the vessel you’re holding your homemade product in, pump or drop one to two pumps/drops (each pump or drop should be about a pea-sized amount) into the palm of your hand. Dab a bit of the product on your nose, chin, cheeks and forehead to evenly distribute the moisturizer across your entire face. Then, blend with gentle, upward strokes. For further moisturization (and a nice aromatherapy session), apply gently to your neck and décolletage.
Incorporate a facial oil into your skincare routine
There are different ways you can incorporate a facial oil into your skin care routine. You can either use it together with a serum (mixing it to emulsify since it may initially want to separate) to act as an additional boost of nutrients. Or you can apply it after the serum to help further lock in the serum’s benefits into the skin. You can apply your facial oil in the morning and evening to ensure your skin is staying moisturized or even use it as a spot application for skin issues you would like to tackle.
Conclusion
Making a homemade facial oil is an excellent way to introduce an oil-based moisturizer into your skin care regimen. If you have been using facial oils for a while, it’s a lovely way to create a product that is perfectly crafted with your specific skin in mind. Once you get the hang of it, it’s easy to get obsessed with creating your oils—trust us, we’ve been there!
But we also understand that at-home DIYs may not be for everyone. Perhaps you stumbled across this article out of sheer curiosity. Or maybe you read through and don’t have the desire to go out and get all of the individual ingredients recommended if you don’t already have them.
If you feel as if you aren’t ready to make your own DIY product, you can check out our line of high-quality, herb-infused facial oils until you have a desire to make your own at home. Or, if you’re interested in seeing other DIYs, take a peek at our recipes for homemade DIY anti-aging facial masks.
Frequently Ask Questions
Can I apply essential oil directly to the skin?
No, you should not apply an essential oil directly to the skin. When applying essential oils to the skin, use a carrier oil to dilute it. If your skin is extra sensitive, patch test your homemade facial oil or diluted essential oil mixture before applying it fully to your desired area.
Can I mix essential oils with water?
Yes, if you want to dilute the scent, you can do that. Always use distilled water and shake before use since oil and water don’t mix. This is how diffusing essential oils in your space also work. For facial oils, however, we recommend sticking to just oil-based ingredients. Introducing an aqueous-based ingredient with oil for a DIY skin product will require some emulsification to ensure your ingredients don’t separate.
Can I make my face oil without essential oils?
Even though essential oils are recommended in your facial oil recipes, you can entirely leave them out and stick with carrier oils if you prefer not to use essential oils.



Leave a Reply