Table of Contents[Hide][Show]
I’m just going to come out and say it, celebrating the holidays can be REALLY expensive. I love what the holiday season brings – loved ones, old friends, good times, and great food. But I’m not a fan of what the holiday season brings to my wallet – emptiness.
a cost effective way to spread cheer
Finding the more cost effective methods of spreading holiday cheer, while giving a thoughtful gift, has been at the top of my “to-do” list the past couple of years. It isn’t easy. Thankfully, I have a few methods that have resulted in receiving positive feedback from gift recipients.
If you think my loved ones are just being “nice” because it’s the holidays, you are sadly mistaken. They may not be cruel when they disapprove of something I have given them, but they have their ways of making it clear they would prefer not to receive certain items ever again.
One of my methods of cost effective gifts is creating DIY items, and it has been a game changer. If you have the time and access to the necessary supplies, I highly recommend it.
How To: DIY Candles for Christmas Gifts
Candle making is the latest addition to my eternally growing list of projects and gift ideas.
At any given time you can walk into my home and find a candle burning somewhere in the house. Did I lose power in home? Nope, I’m just relaxing.
Lighting candles and turning off all of the lights provides me with a much needed relaxing escape after returning home from work, especially when the candles are scented with essential oils.
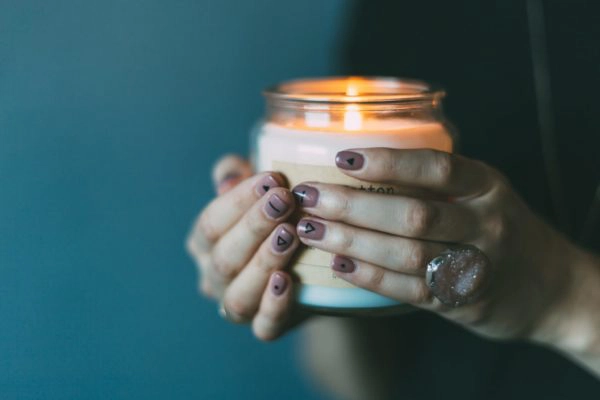
What exactly are we making?
We are going to make mason jar candles, using all natural ingredients and a small batch recipe created with the trial and error that comes with making candles in mind.
Crafting the Candles
Prep Time: 15 minutes
Cook time: 10-15 minutes
Jar Fill Time: 5 mins
Chill time: Overnight
Total Time: 40 to prep, plus overnight chill
Equipment
3 mason jars
1 wooden spoon
3 wicks for a rim diameter of 2 3⁄8 inch inner, 2 3⁄4 inch outer for soy candles
3 wick bar or wooden chopsticks that haven’t been separated
1 hot plate or double boiler
1 candle thermometer, candy thermometer, or electronic temperature gauge
1 small kitchen scale
Small spool of Jute twine
3 decorative gift tags
Ingredients
1 oz -1 ½ ozs of organic essential oil (s) (Helpful tip: 1TB = 0.5 ounces)
1 lb organic soy wax (approximately 5 cups)
Instructions
- First step, let’s grab all of our supplies. And turn on the glue gun.
- As you follow the next steps, lightly warm your mason jars in the oven or microwave. Above room temperature jars are ideal when adding the candle wax.
- Place a pyrex measuring cup large enough to hold 5 cups of soy wax into a pot filled halfway with water. If you don’t have pyrex, create a double boiler using a glass bowl or small mug. The main objective is to minimize exposure to an open flame and direct heat if you are using a gas stove.
- Turn on the stove, bringing the water to a boil.
- As the wax begins to melt, periodically stir it in a slow steady motion with your wooden spoon. Be careful not to splash the wax.
- Using your thermometer, monitor the wax’s temperature and do not allow it to go above 180-185 degrees Fahrenheit. Going beyond this temperature can cause your wax to become discolored.
- When the wax is completely liquified, remove it from the heat source and stir slowly in both directions. Allow it to cool slightly, but not harden.
- You can add your essential oils once the temperature drops below 180 degrees. Slowly stir the wax and essential oils with your wooden spoon slowly in both directions. Allow it cool to about 140 degrees. Please note: the wax you purchase may not allow for 1.5 ounces of essential oil per pound of soy wax. Please follow the manufacturer’s suggested essential oil ratio. Additive effect the quality of the candle’s burn
- While the wax is cooling, grab your jars, candle wicks, glue gun, and chopsticks(or whatever method you have chosen to stabilize your wick).
- Place enough hot glue onto the wick tab, and press it into the center of the jar using square end of the chopstick.
- Once the wicks have been added to all three jars, slide the end of the wick between the unbroken chopsticks, then sit them on top of the rim. Wrap the excess wick around the chopsticks. Each jar has its own set of chopsticks.
- Check your jars and make sure they are slightly above room temperature before pouring.
- Check the of the wax. If it is about 140 degrees, slowly and carefully pour the wax into the mason jars. Be sure to pour as close as you can to the candle wick. Do not fill the wax to the top of the jar. Stop your pour at, or slightly below the lip of the jar.
- Be sure to place the jars on a flat surface and allow them to cool overnight. Do not disturb the jars, place in a refrigerator, or in an area with extremely cold temperatures.
- The next day, check on your candles. All should be solid. If you see imperfections, check the “helpful tips” area below.
- Use your scissors to cut your wick to about ¼ to ½ inch.
- Grab your jute twine and gift tags. Write the name of the recipient on the tag.
- Wrap your jute twine 3-4 times around jar, below the lip of the rim. Wrap it so that you are able to thread the gift tag, and tie a simple bow. You should the able to replace the band of the jar.
And just like that, you’re done! But, keep reading, there are some really important bits below.
a few notes for new candle makers
Research, research, research. It is extremely important that you research all of the products you plan to use, and pay close attention to the manufacturer’s instructions once they are purchased.
Although the steps for making candles are very straightforward, you can cause yourself a great deal of grief if you overlook necessary details when creating candles. A few items to take note of:
Wax type
Wherever you choose to purchase your wax, be aware of the manufacturer’s instruction for adding additional ingredients.
The quality of your pour, and burn of your candle can be greatly affected when the wrong ingredients and ratios of the ingredients are added to the wax. Look for organic, sustainably sourced soy wax when you can!
Flash point
This important when adding scents and other ingredients to your wax. It is important to know the flash points because you can start a fire while making your candles, or cause your essential oils to burn and evaporate while the candle is lit.
The best rule of thumb is using additives with a flash point higher than the wax.
Melt Point
You need to know the melt point for your wax to ensure a higher quality candle, pour, and burn. Melt point is also important when adding perfumes, essential oils, and dyes. Not all dye comes in liquid form, some come in cubes that require melting. If the dye has a much higher melting point, you could risk burning the wax in a attempt to melt the dye cube.
Wick Size
The size of the candle wick is super important, and also determines the life of your candle. If the wick is too small, it will create a tunnel around the wick and burn out too soon.
If it it too large, the flame will flicker and overheat the wax and create soot that darkens the inside of the container. Always adhere to the manufacturer’s recommendation for wick type and size, based on the size of you candle and the type of wax being used.
Heat tolerance of container
Not all containers are created alike. Just because may seen like it can handle candle heat, doesn’t mean that it can. Glass that can a tea light, may not be able the handle being made into a candle. Be sure to know the flame and heat tolerance of the container you are using.
10 Tips for Avoiding Flaws, Wet Spots, and Other Woes
- Pour more slowly for more even wax
- Stir your wax melted wax slowly and steadily to reduce air bubbles.
- For a smooth pour, heat your containers between 90-100 degrees in your oven.
- To reduce crystals, pour your wax at a lower temperature. For smooth and even lay of the wax, pour at a slightly higher temperature.
- Elevate the candles on a wire cooling rack so the counter or table top doesn’t pull the heat out the bottom of the container and cause the wax to cool too fast.
- Avoid extreme room temperatures and allow your candles to cool down at room temperature.
- After the candle is solid and has cured, pour a little more melted wax on the top surface of the cooled candle, or use a heat gun to smooth out flaws.
- To eliminate wet spots, make sure your jar has been cleaned thoroughly and is completely dry before pouring. Warm in the oven can dry the spots.
- Space your candles at least 4-5 inches apart while cooling.
- Use a wire rack to cool candles when necessary. Countertop cooling can sometimes caused the wax chill inconsistently
have fun!
I’m done with my candle information overload. Don’t get discouraged if “round 1” of candle making doesn’t go according to plan.
Hopefully this little DIY project help you jump start your own, or you become the official candlemaker of your friends and family.
Happy Holidays!
Sources
https://www.aftelier.com/Aftelier-Natural-Perfume-Wheel-p/wb-wheel.htm
https://www.tisserand.com/
https://www.mountainroseherbs.com/principles/sustainability/organics
https://www.researchgate.net/publication/323243863_The_changing_face_of_urban_air_pollution
https://craftycandlesupplies.com.au/wick_guide_choosing_the_best_wicks_for_your_soy_candles/
http://www.wholesalesuppliesplus.com/pdfs/essentialoilchart.pdf
https://www.mayoclinic.org/healthy-lifestyle/consumer-health/expert-answers/aromatherapy/faq-20058566
https://rusticescentuals.com/Wick-Chart.html
https://www.lonestarcandlesupply.com/candle-making/candle-wicks/guide-to-wicking
https://craftycandlesupplies.com.au/wick_guide_choosing_the_best_wicks_for_your_soy_candles/




Have you tried making candles before? Share your tips and tricks in the comments below!