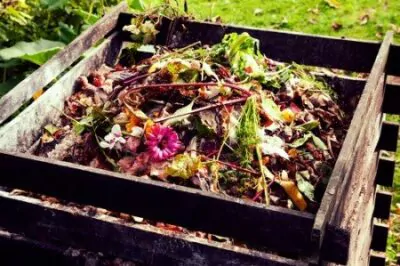
If there’s one thing magical about this world, it’s that you can turn poop into food. Compost is the natural process by which organic waste breaks down into nutrient-rich fertilizer. It happens whether we make a pile of food scraps in our yard or not, but when it happens in a landfill, it doesn’t do anyone any good.
Instead of paying for chemical varieties, why not use this free, organic fertilizer instead?
Making Good Use of Waste
Thirty percent of the waste that ends up in our landfills is from the kitchen, which means we could reduce what’s going into these trash heaps by a whopping third if we all composted. San Francisco championed city composting when they mandated it in 2009, and about 90 cities have created composting programs since then.
Even if you are lucky enough to be in a city that composts, making your own compost pile is fun and allows you to use the fertilizer you produce in your own garden. We love learning to make something that we normally have to purchase. What’s good for your wallet is often good for the environment, too.
When it comes to starting compost, I think people imagine it to be more difficult than it really is. There are a lot of ways to go about churning out this magical substance, so today we are outlining three options, and trying to answer any burning questions you may have standing in your way of digging in!
Composting: The Basics
Composting can be done inside or outside, depending on what kind of space you have and what kind of system you want to create. And it doesn’t have to smell! In fact, smelly compost is usually a sign that something’s gone wrong.
What Can You Put in Your Compost?
City composting systems are huge and can handle pretty much anything plant-based or edible that you throw in there. When you do it at home, however, you want to be careful. Avoid adding animal products or oil (but read on for an exception to this rule).
Method 1: Classic Indoor Bin Compost
This kind of compost is aerobic, meaning it needs oxygen to function properly. You’ll be able to toss in most of your kitchen scraps, but skip animal products and oil. Resist the lazy devil on your shoulder telling you to plop an entire grapefruit, sticker and all, into your compost. It’s best to cut scraps into smaller pieces to promote quicker decomposition.
Building your compost bin:
To start your compost system, all you need is a plastic container with a lid. Buckets from hardware stores with screw top lids work well. If you want to put it under your sink, go with something small. Keep in mind that smaller compost piles will not get as hot—thus it can take up to a year to yield mature compost. For this reason, it’s a good idea to buy a few bins, so when one if full and decomposing, you can have another to put your new scraps in.
If you want something with no DIY required, automatic compost bins such as Naturemills makes are pretty easy. I mean, the people on their homepage are able to engage in flirtatious office behavior all while composting their extra lunch. Impressive!
Drill holes in the bottom and sides of your bin to allow air to circulate. This will actually help your compost smell less, since lack of air circulation can cause smelly problems. Place a tray underneath the bin to catch the “compost tea.” This stuff is potent and can be diluted 100:1 and applied to plants, as well. It’s great for your pipes, too, so don’t feel bad if you just pour it down your drain. If your bin is outside, let the soil soak up the compost tea.
The compost recipe:
If your system is small, avoid adding things that will take a long time to decompose, and especially things that attract rodents. They are not invited to the compost party. Things to avoid are animal products (including waste from your pets), anything with oil on it, magazines, diseased garden material, and anything laminated (so no tetra packs that your almond milk or orange juice comes in).
The compost ratio:
Color code your compost! The mix should be a pretty even mix of “green” (nitrogen rich) and “brown” (carbon rich) waste. Layer the two, ending with brown waste on top. Brown waste can include nutshells, newspaper and shredded documents, egg cartons, compostable cups, hay, straw, matches, toilet paper rolls, tissues (skip those that are medicated or scented), or even wine corks. Green waste is your veggie and fruit scraps, and also eggshells, horse or cow manure, grass clippings, and used pet bedding if the pet does not eat meat.
To get your compost cooking, you can add chicken droppings if you’ve got some lying around, tea made from comfrey, nettles, white valerian, or even human urine. Yup. You can add one of these things each time you start a new bin.
Because this system is aerobic, you’ll need to turn the compost to keep air circulating. If it doesn’t seem to be getting hot, add green waste. Bloodmeal, manure, or shellfish shells will expedite the process. You’ll want to make sure it’s hot so that it decomposes quickly and doesn’t become a comfortable place for bugs (if it’s inside).
Once your bin is full, put it outside or out of the way so it can do its thing. You’ll still want to turn it and troubleshoot for any problems, but don’t add too much new material to it at this point, or it won’t all turn to compost at the same time. You can start a new bin while this one is decomposing.
Classic outdoor compost:
If you have the space outdoors and a lot of kitchen scraps to toss, you might want to build yourself a three-bin system. With this system, most of the same rules apply. However, instead of using bins, you can make piles of compost ideally in a wood-slatted contraption that you would probably feel really accomplished about if you built it yourself. The Internet is full of really inspiring tutorials.
The gist is that you fill one bin, layering your green and brown waste, ending with brown waste, and then move on to the next pile. Once the second and third bins are full, the first pile should be ready to go (given that it has been properly maintained).
Turning large compost piles like this requires muscle, and ideally, a pitchfork. You want to move all the lovely bits around so the compost can breath. If the piles get dry, spray them down with a little water, but again, they need to breathe, so don’t soak them too thoroughly.
Method 2: Vermicomposting
If you love pets, you might want to try vermicomposting, which uses little earthworms to create the magic. These critters are eating machines that can turn your scraps into very rich compost. What comes out the other end of your worms adds microbes to the compost, helping it decompose faster and actually helping to prevent disease in the plants it fertilizes. Because your worms have permeable skin, there are certain food items you will have to avoid adding to your bin.
What type of worms will you need?
First off, your worms: red wigglers are the compost critter of choice because of their voracious appetites, fast reproduction, tendency to not burrow deeply, and affinity for dense population. You can find them online, at fishing tackle stores, or garden supply stores. They are known to eat half their body weight in food every day! So if you keep track of how much kitchen scraps you’re producing on average each day, you can estimate how many pounds of wigglers you are going to adopt.
How do I set up my bin?
Your bin is similar to the one we discussed earlier: plastic with holes on the sides and bottom, as well as a lid with holes. The bin should be wider than it is shallow. If the bin is outside, you can use tarp to shade the top (worms hate sun) and around the bin, whether it’s inside or outside, to keep them from wriggling away. They are not migratory by nature, though, so they will stay if you keep them happy.
Make your worms feel right at home by making them a bed with shredded paper or newspaper. Wet the material first, and then wring it out so it’s not soggy. Fill about ¼ of the bin with this material. Add a few handfuls of soil to the bin as well, because similar to chickens, worms need rocky particles in order to digest their food. Give them a couple days to adjust before you start feeding them.
What can I add to a vermicomposting bin?
As with typical at-home compost, you don’t want to add oil or animal products to your worm bin, so no extra animal waste, either. Be aware of any foods that have been cooked in oil, or salad with dressing on it. Excess salt, citrus, and hot peppers will irritate their sensitive skin. Keep your worms on an organic diet by skipping produce sprayed with pesticides, and anything synthetic like plastics. Bury the scraps below the worm bedding.
I think red wigglers place right below nanopets on the list of easiest pets to maintain. You only have to feed them once a week! Just pay attention to what they are and aren’t eating, and if the pile starts to smell, feed them less. Also, this system needs air, too, so remember to keep things moving in there and not too soggy.
Harvesting from your worm bin:
Happy worms will double their population every three months! When it gets crowded, you can start a new bin with the extra worms, or give them to friends as birthday presents.
Compost will be ready in about four to six weeks, and the best stuff will be at the bottom. When you’re ready to harvest, one method is to stop feeding the worms for about three weeks. Don’t worry! They can survive on the microbes present in the compost. After that, put some food scraps on one side of the bin and give the worms about a week to migrate to that side. After that, you can lift up the bedding and remove what’s rightfully yours.
To ensure you are removing worm-free compost, lay out a tarp outside when it’s sunny and make little piles of compost on it. Worms hate sun and will quickly wriggle away from it, toward the tarp. Every ten minutes, you can remove the top couple inches of soil until you get to the bottom and reveal some slimy friends, which can go into a new composting bin, your friend’s composting bin, or on a fishing pole as bait!
Method 3: Bokashi Composting, or “The Need for Speed”
Bokashi means “fermented matter” in Japanese, and bokashi composting has been practiced by Japanese farmers for quite some time. This style of compost is now gaining popularity in New York, and it’s no surprise, given that this method is fast!
What is bokashi composting?
What makes this method different is that it uses starter microbes to ferment food scraps and promote quick decomposition. It is also anaerobic, unlike other compost systems, and thus should not be turned or excessively opened. Hooray for less work!
Unlike normal and worm composting, where the heat kills pathogens, bokashi compost kills pathogens through acidity. One major bonus to this technique is that you can add things like meat and dairy without a problem.
How to make a bokashi compost bucket.
To get start, you’ll need two buckets that stack one inside the other. Round buckets from hardware stores work well. Those with screw tops are easier to open and close. Drill holes into only one bucket, which will go inside the other. Delicious compost tea will drip from this main bucket into the bucket below, making it super easy to collect this nature juice.
A ceramic plate with an attached handle or a lid from a kitchen pot goes inside the bucket to keep waste compressed and away from contact with oxygen. Keep the scraps pushed down.
If you want to keep things easy, you can purchase a ready-made bucket that comes with Bokashi bran and has an adorable little spout.
The recipe:
You need some microbes to get this party started. You can buy premade Bokashi from supply stores like TeraGanix. Follow the directions on the pouch and add it your bucket.
Next, a carbohydrate-rich layer of kitchen scraps will jump-start the fermentation process. Add layers of waste a couple inches deep, paper scraps in between. Add food everyday, preferably only once a day to avoid overexposing the pile to air. Avoid adding rotten or moldy food! The organisms present on already decomposing waste could throw off the balance of your bucket.
Using the compost:
After a couple weeks, the compost should smell a little sweet and look somewhat broken down. You can add this straight to your compost pile or vermicompost system, or dig a trench in your yard and plant directly in it after two weeks.
First, you were bombarded by kitchen scraps, and now you’re inundated with composting dos and don’ts. Hopefully we’re a little less confused than when we started, or at least more inspired!
Unfortunately, we cannot convince your roommates to let you keep the compost in the kitchen. You’re on your own with that one.
Do you already compost? We’d love to hear all about it!
By Hope Freije
* * *
Sources:
Grow Great Grub, by Gayla Trail
Bokashi High-Speed Compost, by Amy Grisak of Urban Farm: Sustainable Citying
https://www.youtube.com/watch?v=JHE5hyIyNqk
http://makezine.com/projects/make-your-own-worm-bin/
https://www.youtube.com/watch?v=PJq21pyENFU
http://www.organicgardening.com/learn-and-grow/7-solutions-common-compost-problems


Our outdoor compost bin is full of slaters.
We live in Australia – Perth, where climate
is hot and dry in summer.
I am sure that they help with decomposing,
but once the compost is used in the garden they feed
on the young seedlings.
What is the best way to solve the slater problem, any suggestions?
Thank you
This was a great article. We have 3 compost bins in our back yard that we use for my flower and hubby’s vegetable gardens. As a quilter I have many small 100% cotton scraps left over from my projects. I have been adding these small scraps to my compost piles, as long as they are 100% cotton. They decompose in about 1 year. Talk about recycling. Quilters are some of the most creative recyclers.
It’s rather a awesome plus helpful bit of facts. I am happy that you just shared this handy info here. Make sure you stop us educated this way. Thank you spreading.