Table of Contents[Hide][Show]
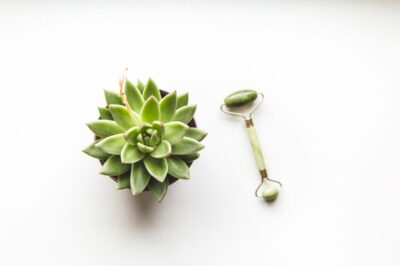
With the exciting launch of our new Jade Stone Roller, we wanted to share with you a complete guide on how to use one, from an esthetician’s perspective.
We all want an easy to use skin care device that looks beautiful, is reasonably priced and comes with a long list of skin benefits. The jade roller fits this description, so it’s not surprising that this pretty tool has been popping up everywhere.
How to use a jade roller?
With its popularity showing no signs of stopping, I am repeatedly answering questions about the jade facial roller for my clients in the treatment room. Multiple times I have also found myself calmly answering by gesturing a sequence in the air with curious strangers looking on at parties.
I am sure I look like a hilarious Bob Ross impersonator and instead of painting the “happy trees” that he was famous for, I am showcasing how to paint “happy faces” while I wave an imaginary jade roller through the air. I am sure I look ridiculous.
On the bright side, these experiences inspired me to create the below special sequence using the Jade Stone Roller for your 24/7 reference.
Top questions about Jade Rolling:
- “Does it really do anything?”
- “How do I clean it?”
- “How exactly do you use it?
The short answers are:
- Yes, discover how it works and the skin benefits, which are similar to facial massage.
- Clean it like a delicate dish. Use soap, water and dry it with a soft cloth. Note that if your tool is responding weird, your Jade Roller might not be real Jade.
- Check out the sequence below to learn how to use the jade roller at home for the best skin results.
Your 7 Step At-Home Jade Rolling Routine
PREPARE
The skin should be free of makeup and clean, hands freshly washed with hair tied back or held away from the face.
The skin should have a fresh and generously applied oil serum or balm of your preference.
For body positioning, you can choose: Perform the sequence seated, spine tall and aligned with the feet firmly on the floor –or– standing with your spine lengthened and tall, shoulders down, in front of a mirror.
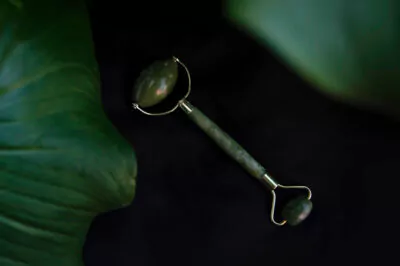
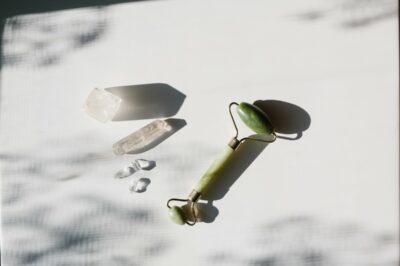
Note: The Jade Roller is 2 sided. There are small and large rolling sides. LR = The large roller side. sR = The small roller side.
1. Relaxing Breath
Close your eyes and take 3 deep breaths. Breathe deeply through the nose and exhale completely through the mouth.
You can incorporate an essential oil of your choice during this step if you’d like
2. Smooth Forehead
Visually separate your forehead into sections like the hands of a clock face at 9, 10, 11, 12, 1, 2, and 3 o’clock. [12 o’clock is your center forehead line and 1 and 3 o’clock are across the brows past your temples to your hairline.]
Preparing
Gently rest the LR jade horizontally at the bridge of the nose, between the brows. [This is the starting point for the clock sequence.]
Take a Deep Breath.
Smoothing from the forehead to the hairline
As you exhale, apply pressure and roll up the center 12 o’clock line of the forehead all the way to the hairline. Without pressure roll back to your starting point.
Apply pressure and roll across 1 o’clock of the forehead all the way to the hairline. Without pressure roll back to your starting point.
Apply pressure and roll across 2 o’clock of the forehead all the way to the hairline. Without pressure roll back to your starting point. Turn LR vertically.
Apply pressure and roll across 3 o’clock of the brow/forehead all the way across temples to the hairline. Without pressure roll back to your starting point. Turn LR horizontally.
Repeat on opposite side.
Once you finish on the opposite side, apply pressure and roll across 3 o’clock of the brow/forehead all the way across temples to the hairline. Without pressure roll back to your starting point. Turn LR horizontally.
Apply pressure and roll up the center 12 o’clock line of the forehead all the way to the hairline.
Without pressure roll back to your starting point.
OVERVIEW
Move your jade stone roller across your forehead, moving in this sequence: 12 o’clock > 1 > 2 > 3 > 12 > 11 > 10 > 9 > 12 o’clock
3. Bright Eye Lift
Visually separate the area around your eyes into 7 sections.
[1-3] 3 sections over the brow – inner, center, outer – to the hairline.
[4] 1 section from the outer corner of the eye across the temple.
[5-7] 3 sections under the eye – outer, center, inner – to lash line.
Close the eye you are performing sequence on.
preparing
Tilt your head back and lift your chin gently during this sequence. [This will feel much better than performing the eye lift sequence with chin down and face looking directly forward. This also assists in lymph system drainage for better skin results.]
Gently rest the LR jade horizontally at the bridge of the nose, slightly inward at the base of where the inner brow begins for the closed eye. [This is the starting point 1 for the eye lift sequence.]
Take a Deep Breath.
Rolling out around the eyes
Apply slight pressure and roll over the brow, lifting it gently, smoothing all the way up across the forehead to the hairline.
Lift roller and gently rest at position 2, the center of the brow, below the brow hair on the bone of your upper eyelid [not on the eyeball]. Apply slight pressure and roll over the brow, lifting it gently, smoothing all the way across the forehead to the hairline.
Lift roller and gently rest at position 3, under the tail of the brow. Apply slight pressure and roll over the brow, lifting it gently, smoothing across the forehead to the hairline.
Lift roller, turn vertically and gently rest at position 4, at the outer corner of the eye. Apply slight pressure and roll across the temples into the hairline. Lift roller, flip to sR side and turn horizontally.
below the eyes
Gently rest at position 5, the outer area below the eye, on the orbital bone [top edge of the cheekbone]. Apply almost no pressure and roll up the short length, gently toward the under eyelashes.
Lift roller and gently rest at position 6, on the orbital bone in line with the center of the eye. Apply almost no pressure and roll up the short length, gently toward the under eyelashes.
Lift roller and gently rest at position 7, on the orbital bone, near the nose, in line with the inner corner of the eye. Apply almost no pressure and roll up the short length, gently toward the under eyelashes.
from below the eyes to the temples
Lift roller, turn vertically. Place back on position 7 that you just rolled. Apply slight pressure and roll gently outward, across the edge of the cheekbone, up slightly to go over the temple and into the hairline. Repeat this movement 3 times.
Lift roller, flip to LP side vertically, gently rest at the original position 1. Apply slight pressure and roll gently outward, across the brows, down slightly to go over the temple and into the hairline. Repeat this movement 3 times.
Repeat on opposite side
Pause and prepare for the sequence on your opposite eye. Repeat sequence on the opposite eye.
OVERVIEW:
Right Eye Sections:
1up > 2up > 3up > 4out > 5up > 6up > 7up > 7out x 3 > 1out x 3
Left Eye Sections:
1up > 2up > 3up > 4out > 5up > 6up > 7up > 7out x 3 > 1out x 3
4. Toned Cheeks
Visually separate the cheeks into 3 sections.
[1] Edge of the nostril, across the cheekbone, up to temple.
[2] Outer corner of lips, over smile lines, across the cheek to ears.
[3] Center chin, across the jaw, out to lower ear lobe.
Rolling out the cheeks
Gently rest the LR jade vertically at the side of the nose next to the nostril. Apply slight pressure and roll gently outward across the cheekbone, up to temple. Without pressure roll back to your starting point. Repeat 3 times.
Position 2
Lift roller and gently rest at position 2. Apply slight pressure and roll gently outward from the outer corner of lips, over smile lines, across the cheek to the ear. Without pressure roll back to your starting point. Repeat 3 times.
Position 3
Lift roller and gently rest at position 3. Apply slight pressure and roll gently from the center chin, across the jaw, out to lower ear lobe. Without pressure roll back to your starting point. Repeat 3 times.
Repeat on opposite side
Lift roller and gently rest at position 1 on the opposite side. Repeat sequence.
OVERVIEW:
Right side: Position 1 x3 > 2 x3 > 3 x3
Left side: Position 1 x3 > 2 x3 > 3 x3
5. Firm Neck + Detox
Visually separate the neck into 5 sections.
[1] Side of neck, where jaw and ear meet, down to collarbone.
[2] Center side of the neck, in line with the center of the eye, down to collarbone.
[3] Center chin, down throat to collarbone.
[4] Center side of the neck, in line with the center of the eye. (opposite 2)
[5] Side of neck, where jaw and ear meet, down to collarbone. (opposite 1)
Rolling out the neck and lymphs
Turn heard 45 degrees. Gently rest the LR jade horizontally at the side of the neck, where jaw and ear meet.
Apply pressure and roll over neck tendons from jaw all the way to collarbone and pause. Press 3 times. [like a gentle pumping motion]
position 2
Lift roller and gently rest at position 2. Apply pressure and roll over neck all the way to collarbone and pause. Press 3 times. [like a gentle pumping motion]
position 3
Lift roller and gently rest at position 3. Apply pressure and roll over center neckline all the way to collarbone and pause. Press 3 times. [like a gentle pumping motion]
position 4
Turn heard 45 degrees in the opposite direction. Lift roller and gently rest at position 4. Apply pressure and roll over neck all the way to collarbone and pause. Press 3 times. [like a gentle pumping motion]
position 5
Lift roller and gently rest at position 5. Apply pressure and roll over neck tendons from jaw all the way to collarbone and pause. Press 3 times. [like a gentle pumping motion]
OVERVIEW:
1 down x3 pumps > 2 down x3 pumps > 3 down x3 pumps > 4 down x3 pumps > 5 down x3 pumps
6. Facial Detox Flush
The final rolling steps here ensure the lymphatic system is fully flushed out from your sequences.
Position face forward and head straight and tall.
Gently rest the LR jade vertically at the top of your forehead on the hairline. Roll out and down, follow the outer perimeter of the face, across the temples, over the outer cheeks and jaw, turn the chin 45 degrees and roll down the sides of the neck.
Pause and press 3 times. [like a gentle pumping motion]
and repeat…
Repeat from forehead to collarbone 3 times. Repeat outer face perimeter roll on the opposite side. Pause and press 3 times. [like a gentle pumping motion]
Repeat from forehead to collarbone 3 times.
OVERVIEW:
Left Roll: Facial perimeter and neck > Pump at collarbone x3
Right Roll: Facial perimeter and neck > Pump at collarbone x3
7. Relaxing Breath
Gently rest the jade roller on your center forehead. Close your eyes and take 3 deep breaths. Breathe deeply through the nose and exhale completely through the mouth.
Roll up and off your skin. Roll your shoulders back. Lift the outer corners of your lips into a smile.
Jade Roller Life Hack
Keep the Jade Stone Roller in the freezer. The cooler temperature, in addition to feeling wonderful and invigorating, assists in reducing facial inflammation and swelling during the Jade Rolling routine.
This is especially helpful around the eyes where we can store fluid and have poor circulation after sleep. Rolling in the morning, post-shower, with a frozen jade wand is a truly uplifting way to begin the day. Definitely try it at least once.
flush it out!
I look forward to hearing how the jade roller sequence makes you feel and any benefits you notice in your skin. If you’re brand new to jade rolling, get yours here.
Remember to drink a big glass of water after your jade rolling to assist your body in the removal of everything you just flushed out. Enjoy!

This is wonderful! Thanks so much for the clear guidance!